In term 4 we begin with a series of tutorials and activities aimed at revealing young minds to the inner workings of robotics in the real world.
Every lessons reflects an actual application in the real world using electronic components and programming.
Stay tunned because each week we start or continue with a project and we will publish the students thoughts and we will ask them to reflect on the topic covered each week.
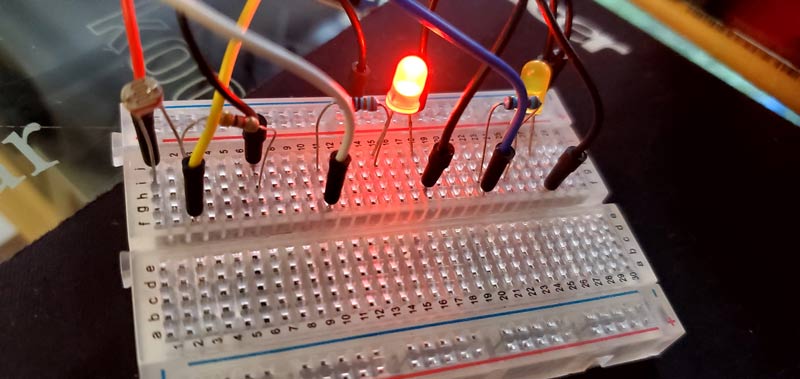
LEDs, breadboards, and resistors are three basic components that can be used to introduce grade 5 and 6 students to basic connectivity, electricity, and resistors.
Connectivity
A breadboard is a prototyping tool that allows students to make temporary electrical connections without soldering. It has a grid of holes that are connected to each other in different ways. Students can insert the leads of components into the holes to make connections.
LEDs are light-emitting diodes, which means that they emit light when an electric current flows through them. LEDs have two leads: an anode and a cathode. The anode is the positive lead, and the cathode is the negative lead. When connecting an LED to a circuit, it is important to make sure that the anode is connected to the positive terminal of the power source and the cathode is connected to the negative terminal.
Resistors are electrical components that resist the flow of electric current. They are used to protect electronic components from too much current. Resistors come in different values, which are measured in ohms. The higher the value of the resistor, the more it resists the flow of current.
Electricity
Electricity is the flow of electric charge. Electric charge can be either positive or negative. Like charges repel, and opposite charges attract.
When an LED is connected to a power source, an electric current flows through it. This current causes the LED to emit light. The brightness of the LED depends on the amount of current that flows through it.
Resistors can be used to control the amount of current that flows through an LED. By connecting a resistor in series with an LED, students can reduce the amount of current that flows through the LED and make it dimmer.
Resistors
Resistors are used in electronic circuits to control the flow of electric current. They are also used to protect electronic components from too much current.
Resistors come in different values, which are measured in ohms. The higher the value of the resistor, the more it resists the flow of current.
When choosing a resistor for an LED circuit, it is important to choose a resistor with a high enough value to protect the LED from too much current. But the resistor should not have too high of a value, or the LED will not be bright enough.
Activities
Here are some activities that I use to introduce grade 5 and 6 students to basic connectivity, electricity, and resistors using LEDs, breadboards, and resistors:
- Lighting an LED: This is a simple activity that students can do to learn how to connect an LED to a circuit and make it light up.
- Controlling the brightness of an LED: This activity teaches students how to use resistors to control the amount of current that flows through an LED and make it brighter or dimmer.
- Building a simple circuit: This activity teaches students how to connect multiple components together to build a simple circuit.
- Troubleshooting circuits: This activity teaches students how to identify and fix problems in electronic circuits.
Using LEDs, breadboards, and resistors is a great way to introduce grade 5 and 6 students to basic connectivity, electricity, and resistors. These activities are fun and engaging, and they teach students important concepts about the electronics at the core of robotics.